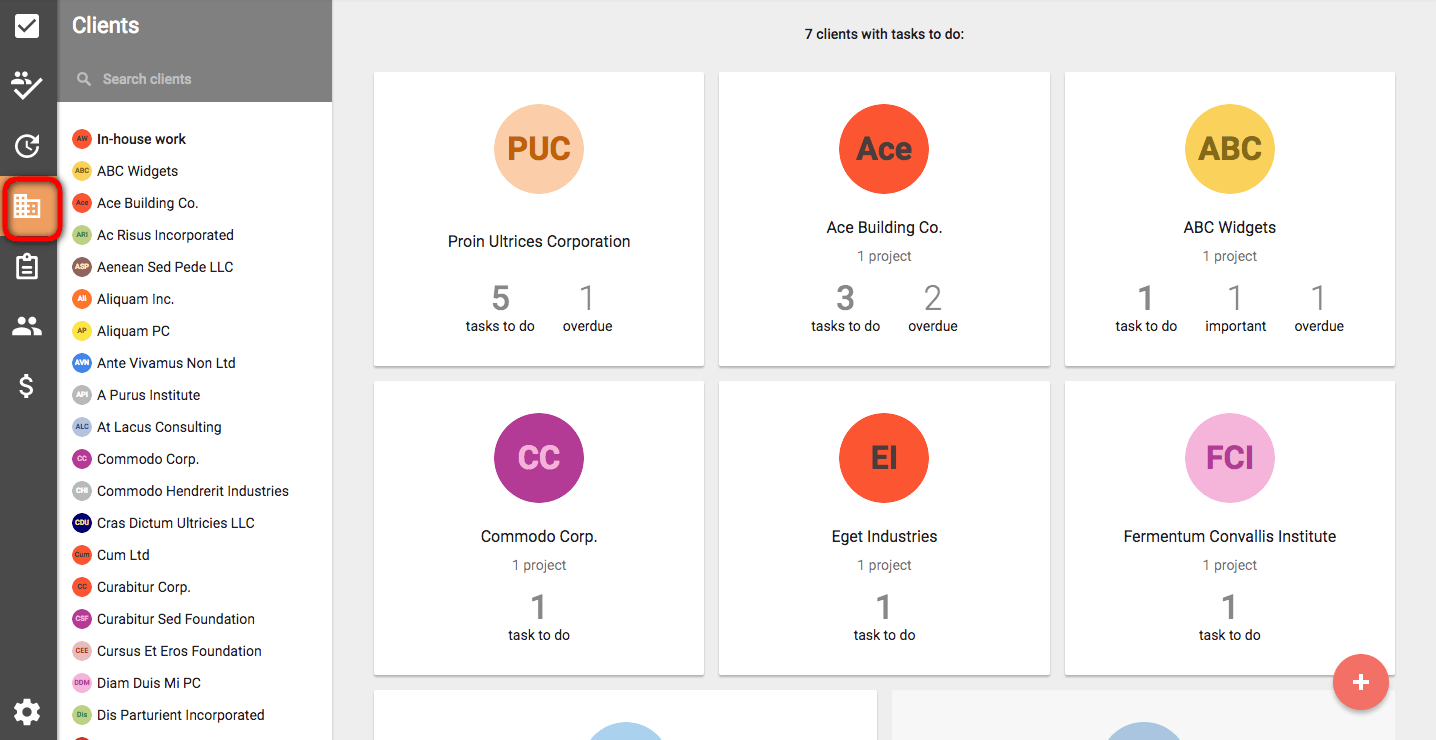
Managing Users
Every person who has logged into todo.vu has created a User Account. They are a user. Of course, many users will have different roles, therefore different requirements in terms of accessing and inputting information into your companies Workspace. todo.vu allows Admins to manage these user accounts. Granting or restricting access as appropriate.
Your User Account
Every User Account holds your name, an avatar, your contact information, credits, login credentials and some system wide preferences.
Merging Accounts
Click on your name in the top right-hand corner. Go to ‘Profile’ and on that page there is a button ‘Merge Accounts’. You will be asked to provide the email address of the other account. todo.vu will then send an email to the other email account asking for confirmation. Once approved, the email addresses for both accounts will be merged and all of the workspaces from both accounts will be merged into the current account.
Accessing multiple Workspaces
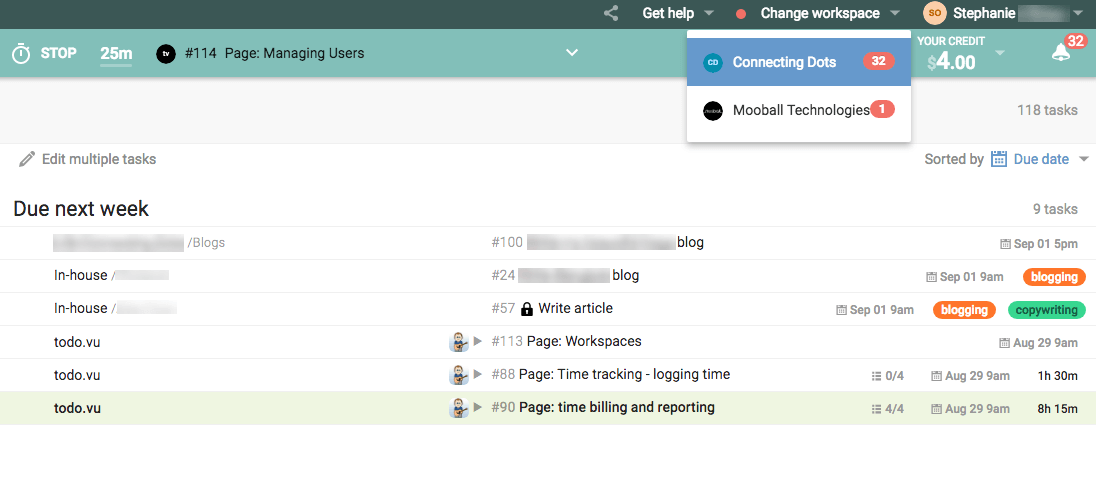
If you are using todo.vu with more than one company, we have made it seamless for you to switch between Workspaces. This ensures that the flow of your work is not disrupted by a clunky sign-in and sign-out process. Your various Workspaces will be connected to you through your account.
Roles
Within each Workspace, you will have a specific role. This role will determine what you see and can do within the workspace. These roles are:
- Owner – Owner is a special role for the User who created the workspace. If you prefer, you can change the owner of a workspace to one of the other Admins.
- Admin – Admins have full access to all of the features of the Workspace. Admins are the only role with access to billing and account settings and rights to make changes to these settings. There is no limit on the number of Admins you can have on a Workspace.
- Staff – Staff have full access to all clients and tasks but not time billing or account information. Staff can be further restricted to specific clients or projects, whatever is preferred by the business.
- Contact – Contacts are the clients linked to the Workspace. Contacts can not be assigned tasks, but they can create them. Contacts have a limited view of the Workspace.
Inviting a new Staff user into your workspace
Owners and Admins can easily invite new Staff users to their Workspace. This can be done a few ways.
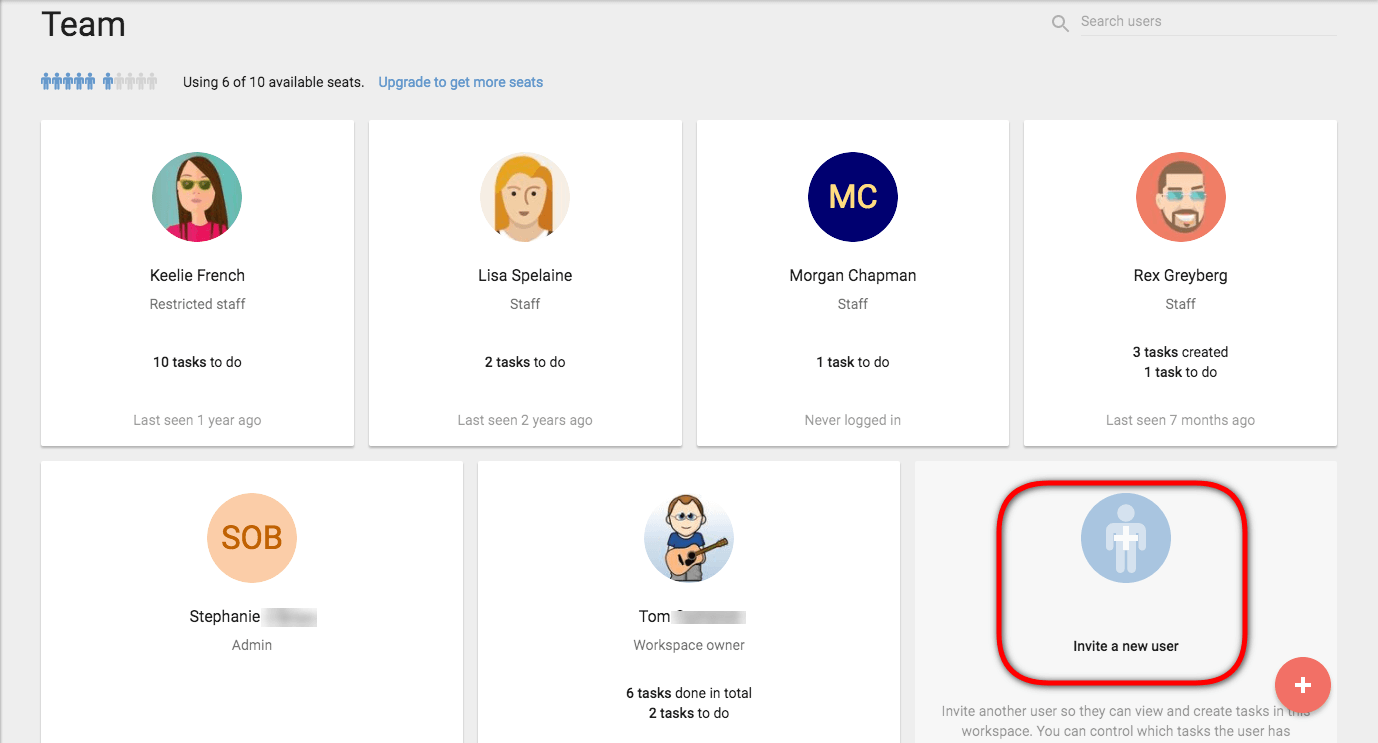
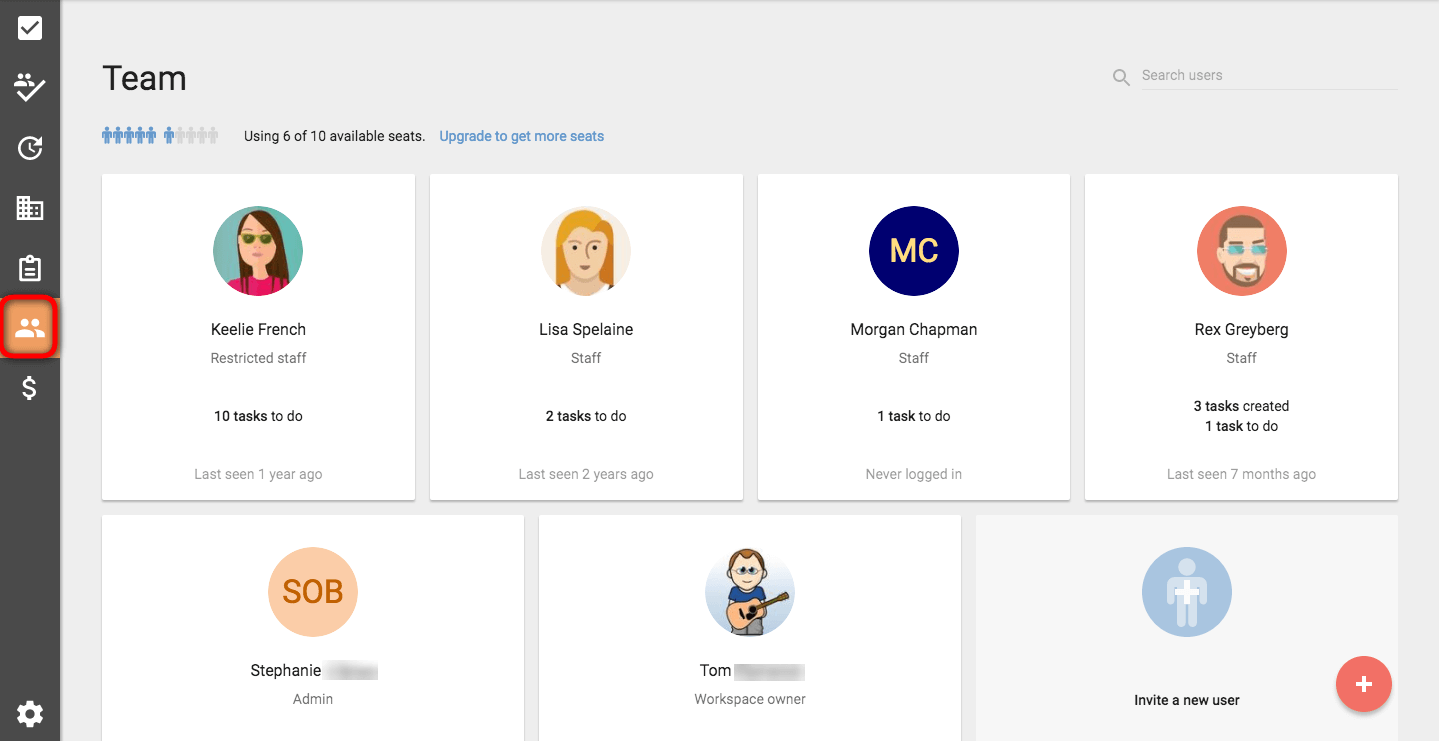
Inviting a new user from Team icon in the left sidebar
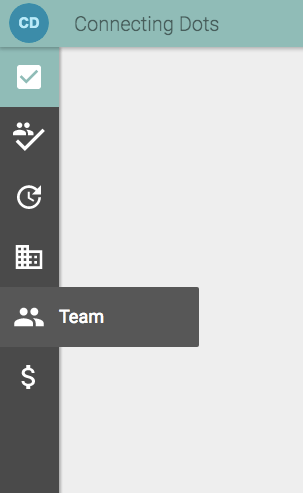
From any page, you can click on the Team button on the left sidebar. From the Team page, you will have a list of all users on the Workspace and then an option to ‘Invite a new user’.
Inviting a new user from (+) icon
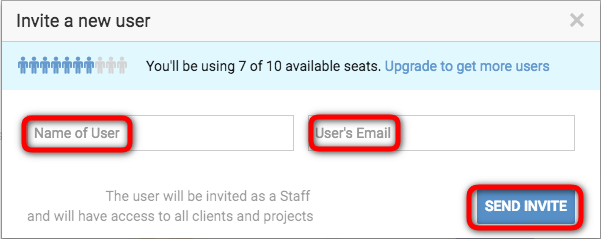
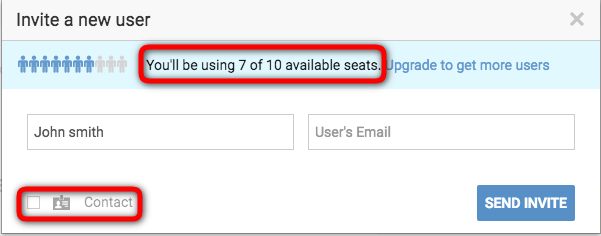
Hovering your mouse over the (+) icon on the bottom right of your screen will bring up various options. Up the top is ‘New user’. Selecting New user will bring up the ‘Invite a new user’ box, same as the image above, where you will be asked to enter ‘Name of user’ and ‘User’s email’.
Add new user from within a task
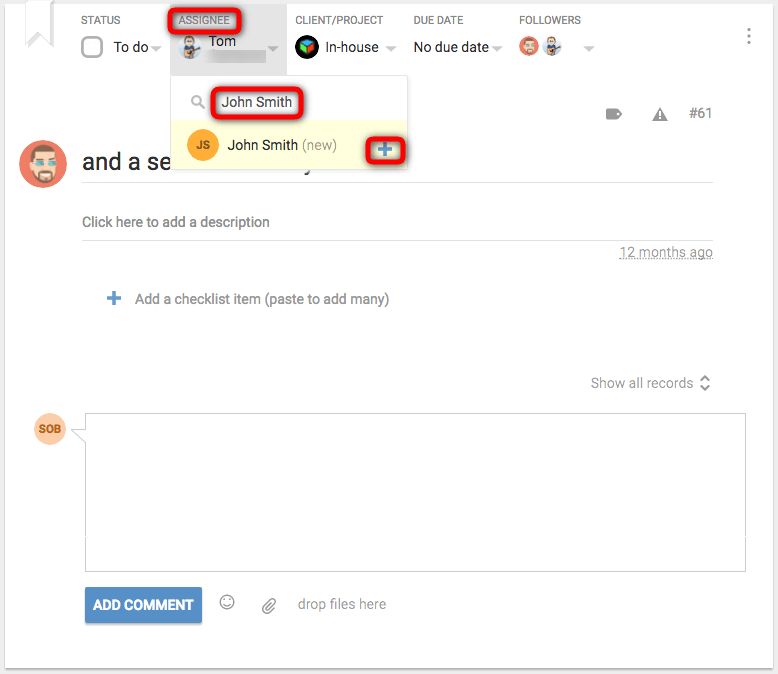
Whether you are adding a new task or you are in an existing task page, you can add a new user on-the-fly.
From within the task page, you click on ‘Assignee’. This will open a drop down with existing Staff and up the top is an option to ‘Search/Invite staff’. In this section, write the name of the person you wish to invite, if the name is not already attached to your Workspace it will bring up a + sign to add them as a new user.
Once you click the + symbol, the ‘Invite a new user’ box will appear and ask you to enter their email and then you simply click ‘Send invite’.
‘Invite a new user’ box options
Seats available – You will notice when the ‘Invite a new user’ box opens, there will be a message along the top alerting you to how many ‘seats’ you have left available on your plan.
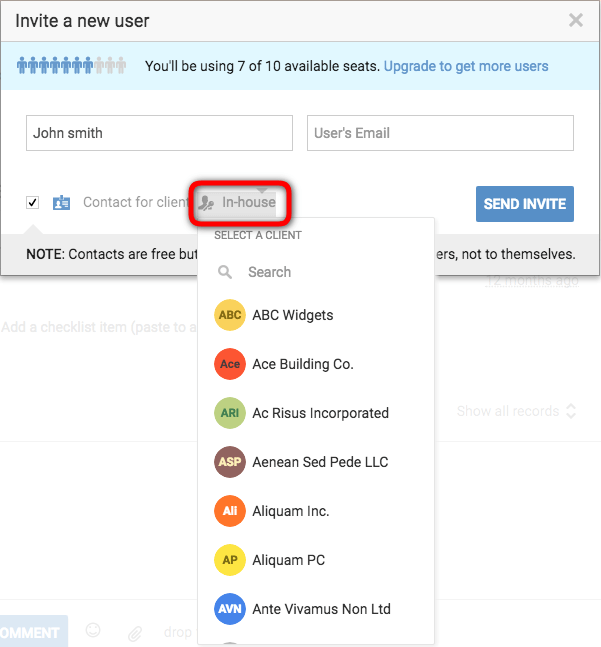
Contact – At the bottom of this box, to the left, there is a box you can select to make this new user a Contact. Selecting this will link them automatically to the Client attached to this task. If you wish to assign them to a different client you can click the drop-down and it will bring up other Clients for you to choose from.
Receiving an invite
Once you have sent an invite to the new user. The user will receive an email asking them to join your Workspace.
User does not have an existing account – If they do not have an existing todo.vu account, they will be asked to create one before accessing the Workspace.
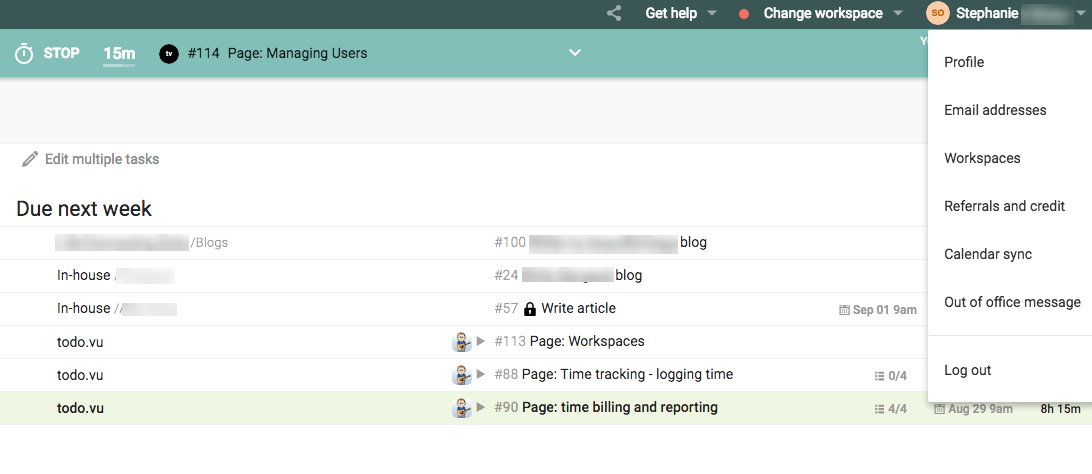
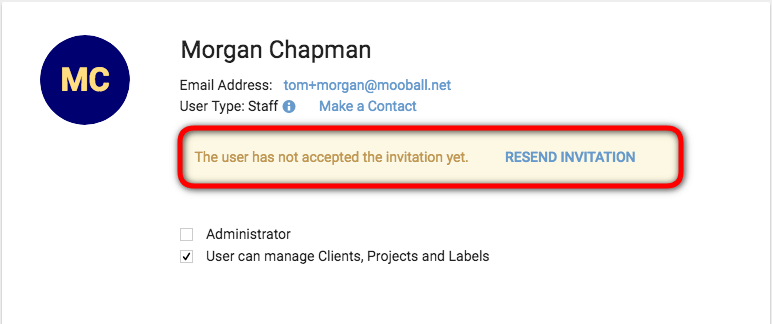
User has an existing todo.vu account – If they do have an existing account, once they click on ‘Accept invitation’ in the email, they will be automatically taken to the new Workspace. Users with existing accounts can also find pending invites in the ‘Workspaces’ section. This section is accessed by clicking on your name in the top right corner.
New user accepting
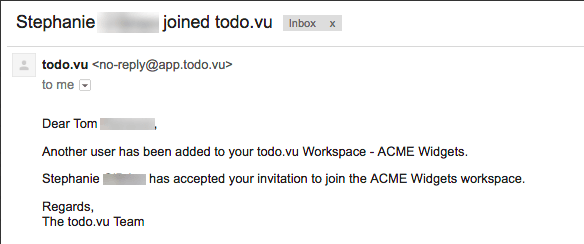
Once your new user has accepted your invite, you will receive an email alerting you of this.
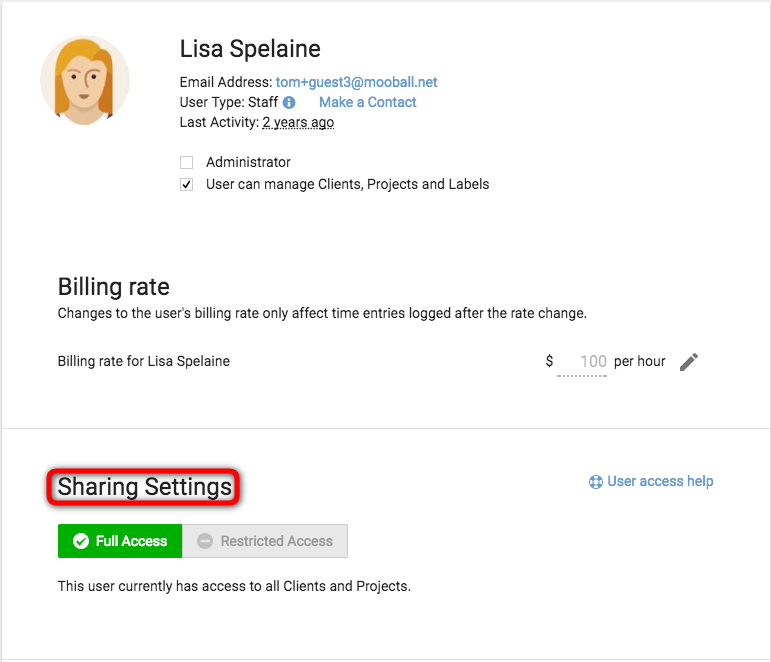
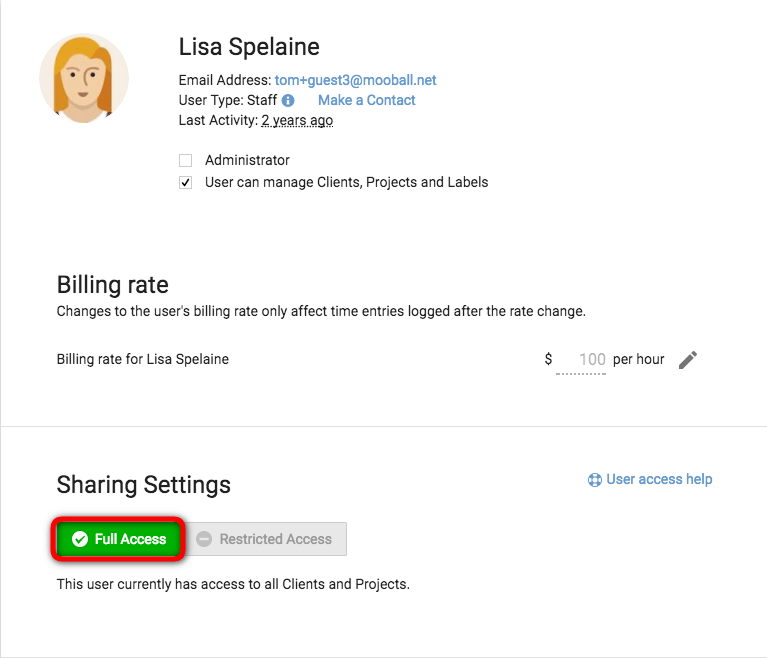
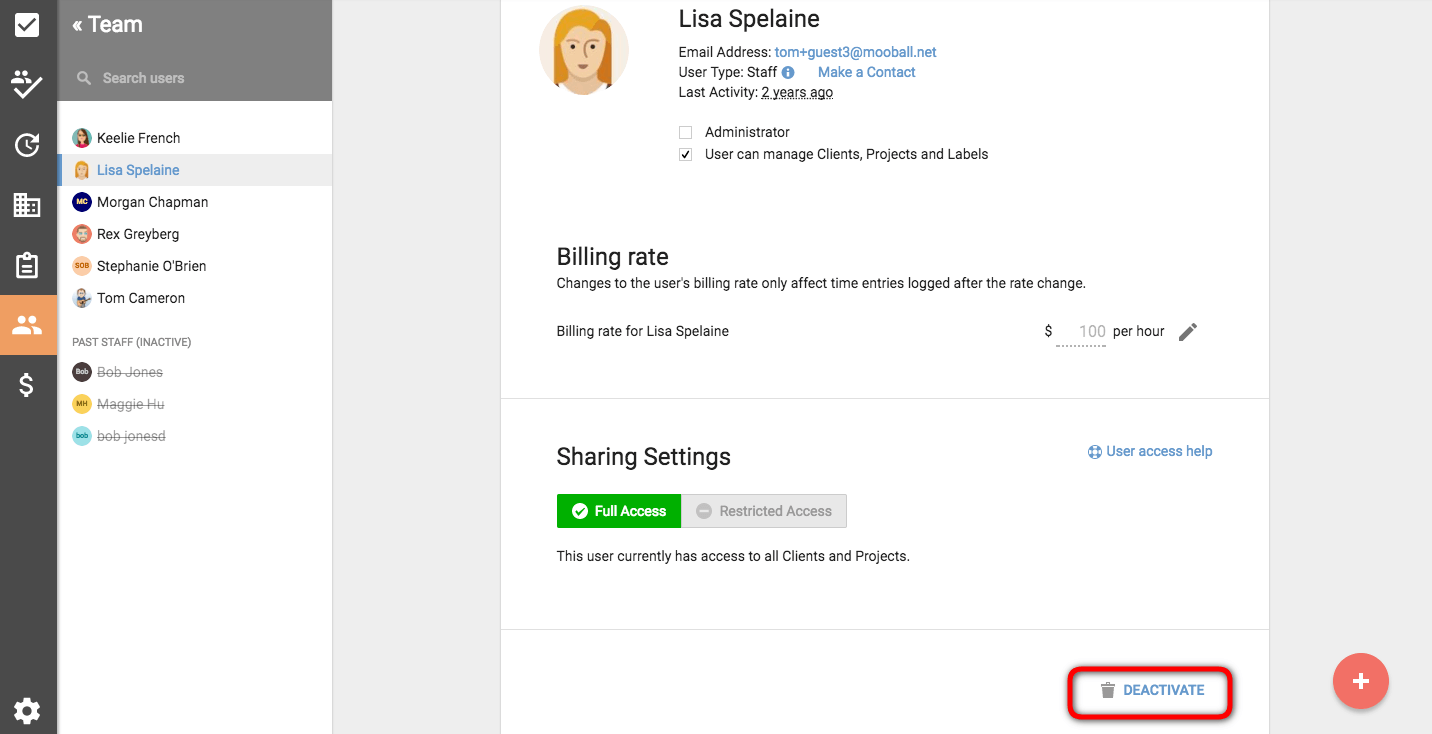
Controlling Staff user access
Admins and Workspace Owners can easily increase or restrict access for Staff users through their user profile under the Team page. You will see on the image below that some users have ‘Staff’ access and others have ‘Restricted staff’ access. We will now walk through how to change between these two. Then, a little further down, we will go through how to change users to ‘Administrators’.
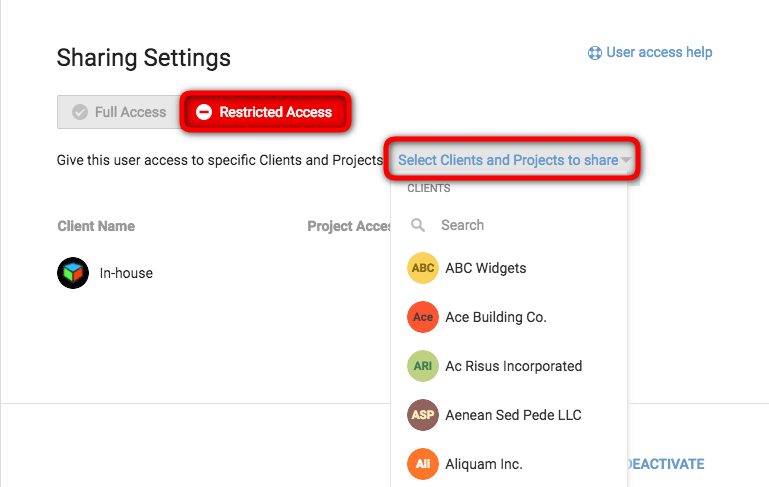
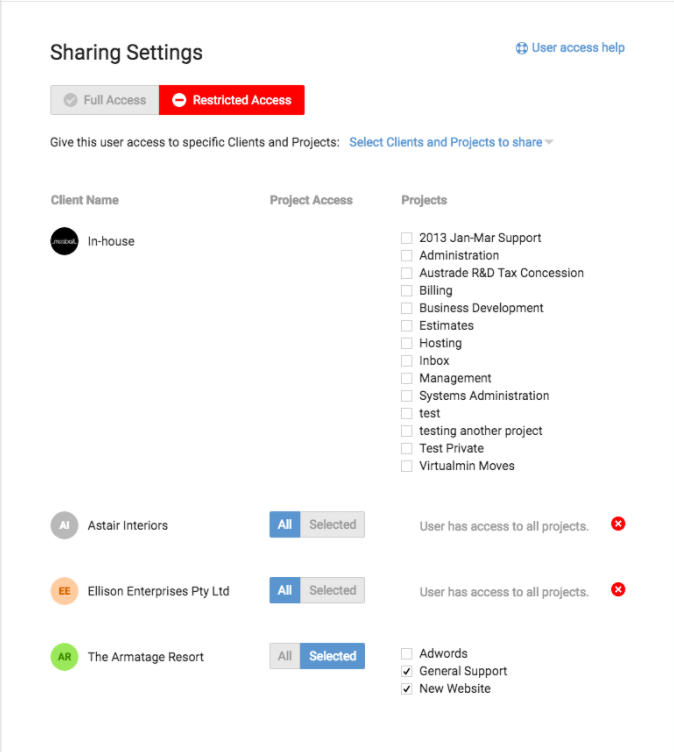
Restricting staff access
Click on the profile of the staff member whose access you wish to restrict. In their profile, you will see a section ‘Sharing Settings’. Because we are going to change them from having full access to restricted access, you should see the ‘Full Access’ button as green.
In order to grant them access to specific Clients and Projects, you click on ‘Select Clients and Projects to share’ and a drop down of all Clients on the Workspace will appear.
Full Access
Exactly as you make someone Restricted staff, you can make them a Staff user will full access to all clients and projects on the Workspace by selecting ‘Full Access’.
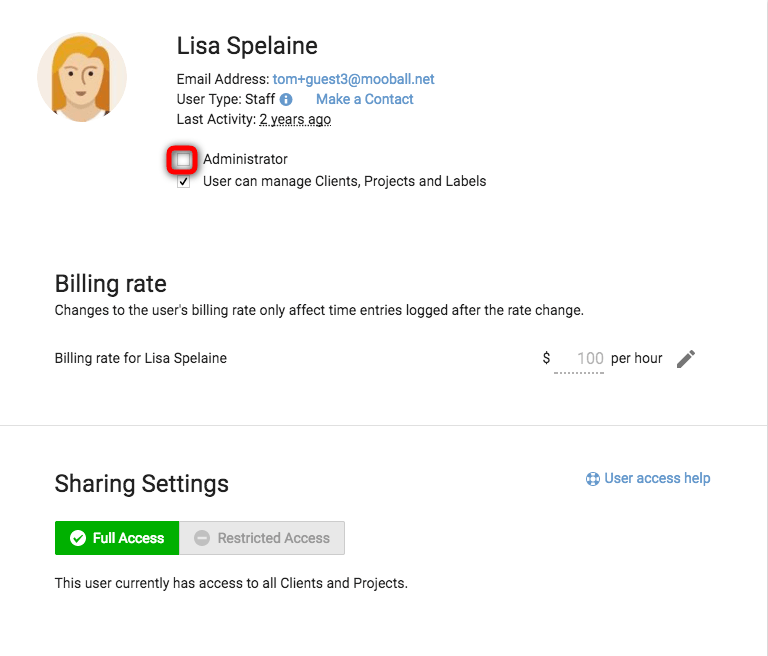
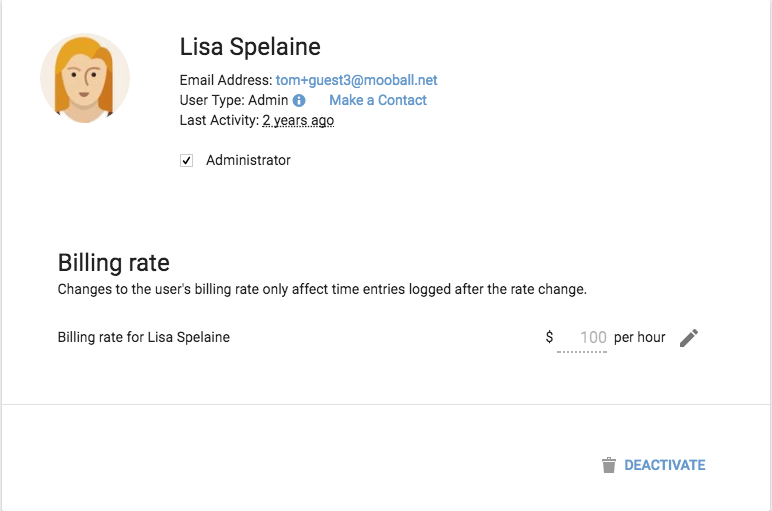
Adding/removing Administrator status
While still in the user’s profile, you will see up the top a box that can be ticked to either grant Administrator status or remove it. Ticking this box will remove all of the access options below as this user will now have access to everything.
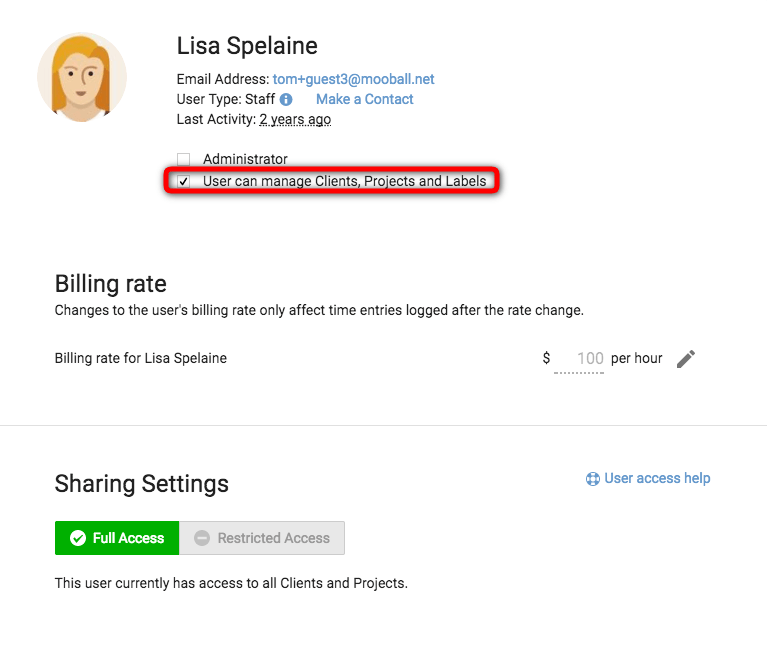
User can manage Client, Projects and Label
Underneath our Administrator tick box is an option to select ‘User can manage Client, Projects and Label’. By selecting this, you will allow that user the ability to add new Clients, Projects and Labels to your Workspace. If this is unmarked, then they are unable to add any new Clients, Projects and Labels to the Workspace. They simply work with what is already existing on the Workspace.
Managing Contacts
There are varying degrees of access you are able to give your contacts. They are:
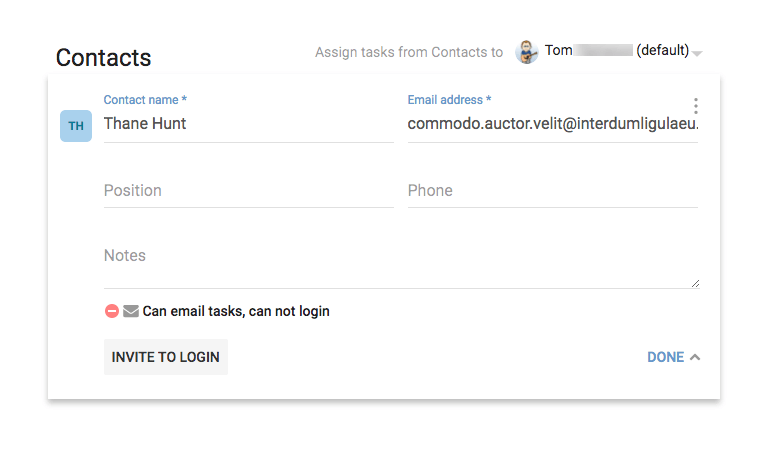
- Email only access – These Contacts have not been invited to log into the Workspace. They will be able to email tasks in and can be added as a follower on a task but they cannot log in to see the task on the Workspace. Any updates to the task will be emailed to them as notification.
- Can login – These contacts can log into the Workspace and see the tasks that they are following.
Adding Contacts to your Workspace
Whether you want to add a brand new Contact or wish to give an existing Contact additional access, you need to go to the Client page and select the Client whose Contacts you wish to give access to your Workspace. You can select the Client from either the list down the left or the main view section.
Adding a new Contact
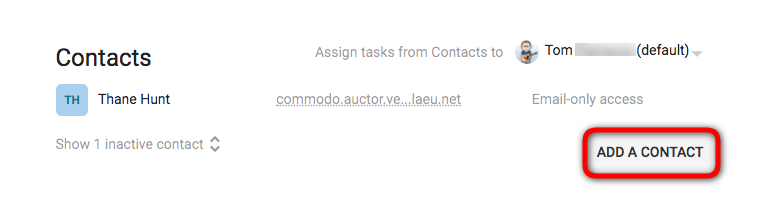
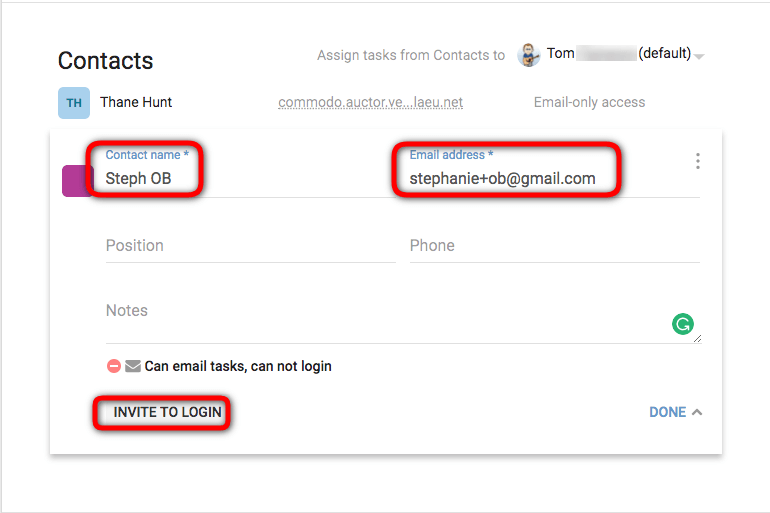
Once you are on the Client page and at the Contact section, you will see a button to ‘Add a Contact’. Selecting this will open a section asking you to add, at the minimum, the name and email address of the Contact.
Once you add the name and email address and click Done, that person is a Contact with email only access. To invite them to your Workspace (can login), you simply click ‘Invite to login’.
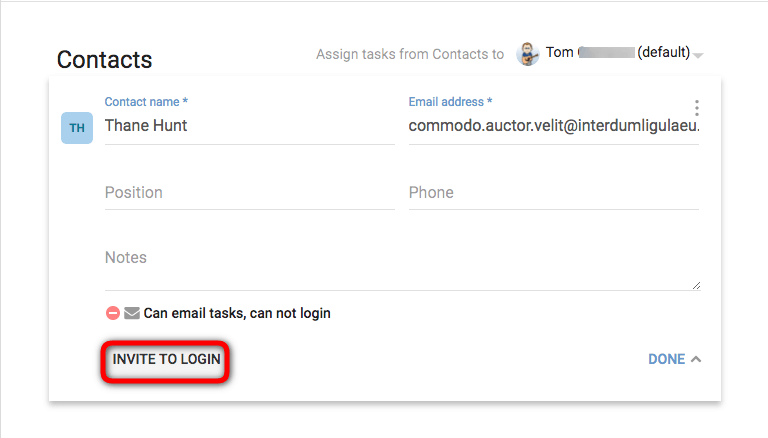
Inviting existing Contact to Login
When you find the Contact you wish to invite, hover your mouse over ‘Email-only access’ and an open to Edit will appear. Selecting this will bring up their details, the same page as when you added a new Contact. You will see at the bottom right of this section, the button to ‘Invite to login’. Selecting this will send them an email asking them to log into your Workspace.
Adding Contact user from within a task
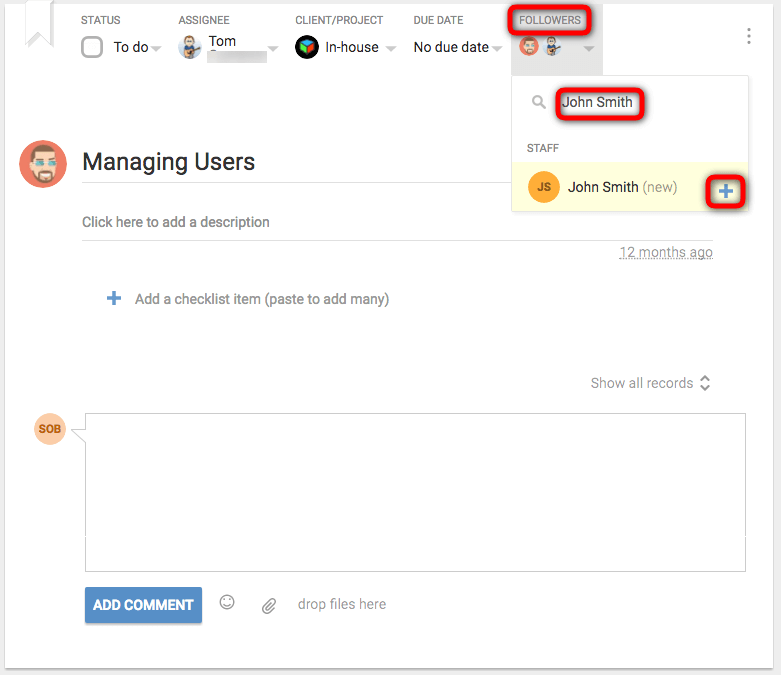
Also within the task, you can add a new Follower on-the-fly. The new Follower is automatically registered as a Contact connected to the client attached to this task. Not a Staff user.
You simply click on Followers. This will open a drop down of existing staff and contacts. Up the top of this box, you can Search or Invite followers. Enter the name of the person you wish to add, then click the + and the ‘Invite a new user’ box will open for you to enter their email address and Send invite.
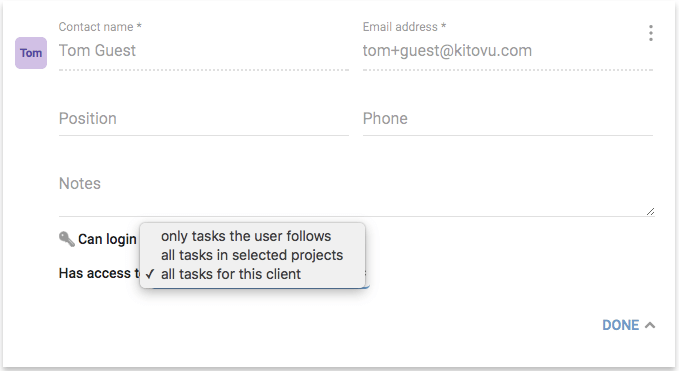
Three levels of Contact access
Once your Contacts have been added and have access to the Workspace, you are able to set their level of access to one of three options:
- Only tasks the user follows – This is the most restricted setting. It means that this Contact only has access to view tasks that they have been added to as a Follower. See Creating Tasks for more information.
- All tasks in selected projects – Selecting this option will allow you to customise the Contact users access. All of the Projects of the Client that the Contact is attached to will appear and you will be able to select which you want to grant this user access to.
- All tasks for this client – As it suggests, selecting this option will give this Contact access to view all tasks that are in the Workspace for the client they are attached to.
Migrating Users from Contact to Staff or Staff to Contact
In some situations, you may have Staff members who work for a Client and need to migrate from Staff access to Contact or vice versa. This is easily done.
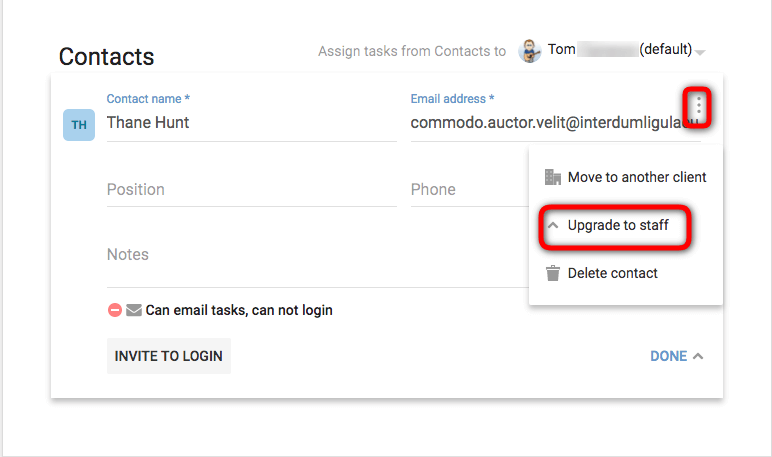
Migrating Contact user to become Staff user
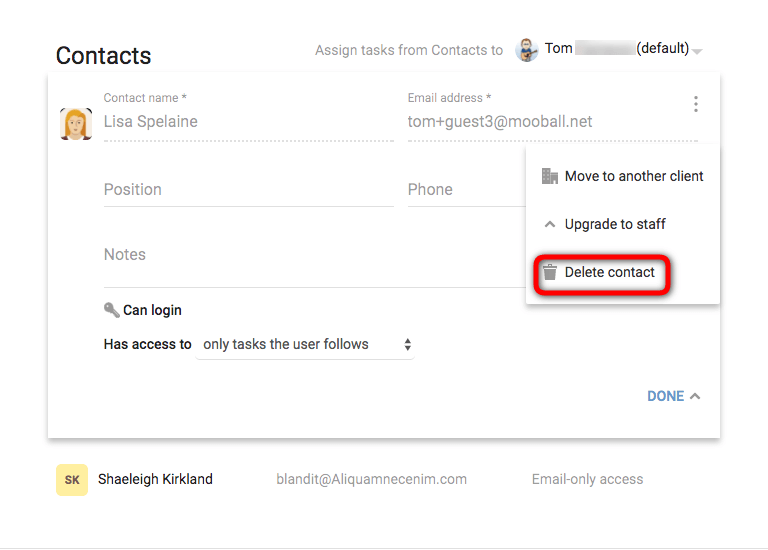
Click on the Client icon on the left sidebar from any page. Once you are on the Client page, select the Client which this Contact belongs to. Go into that Clients page and then scroll down to Contacts.

- Move to another client – From here you can easily transfer your Contacts to other Clients.
- Upgrade to Staff – This is the one we want to select to upgrade your Contact to Staff access.
- Delete Contact – As it states, this will automatically delete the Contact from your Workspace.
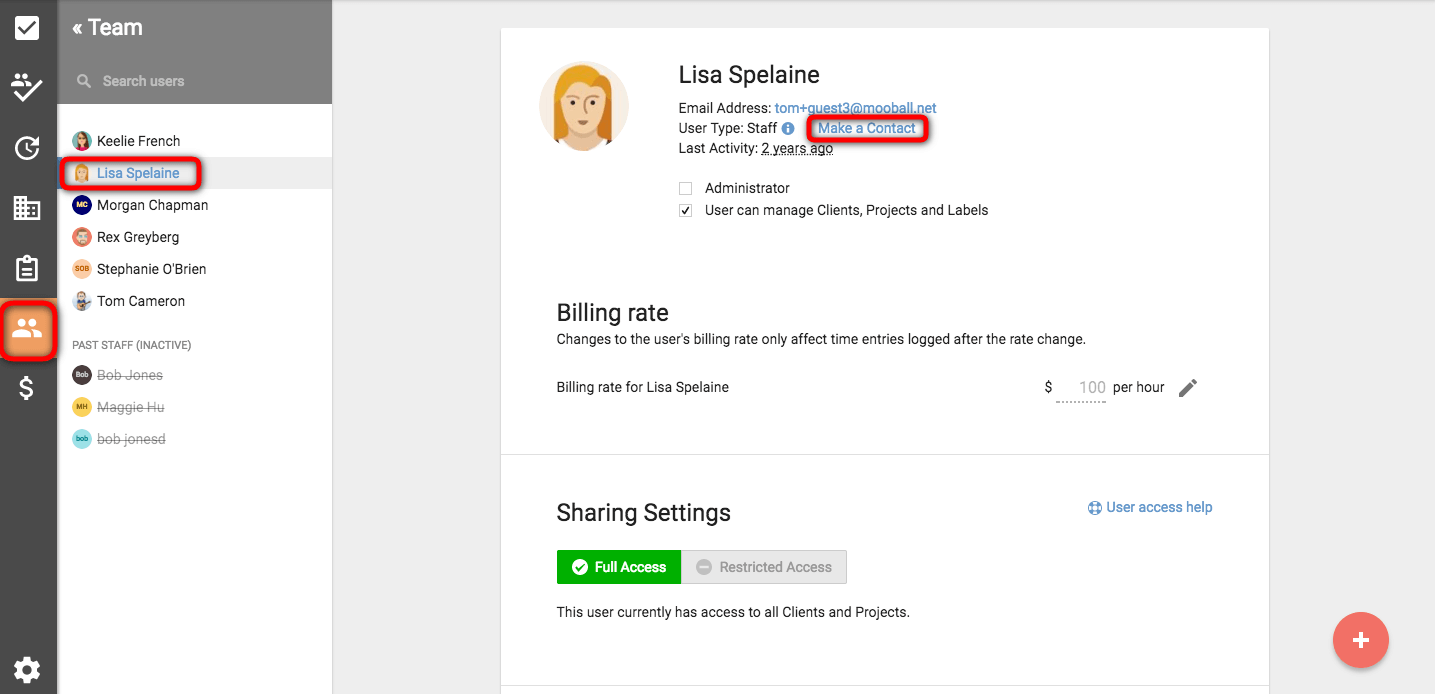
Making a Staff user a Contact
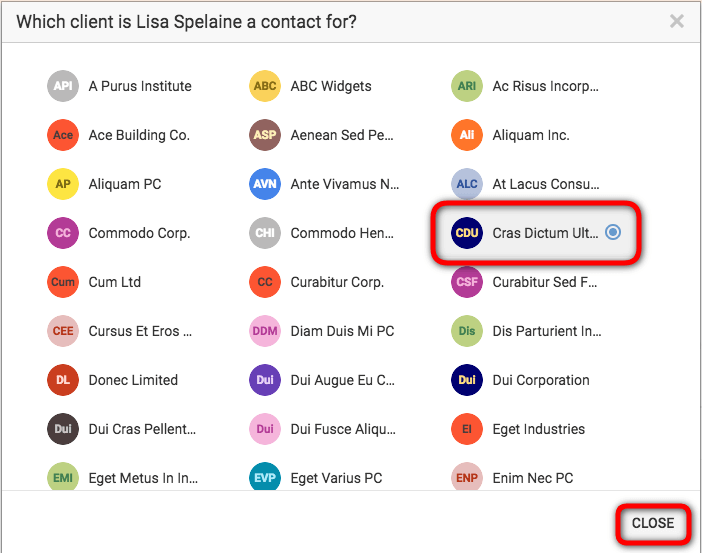
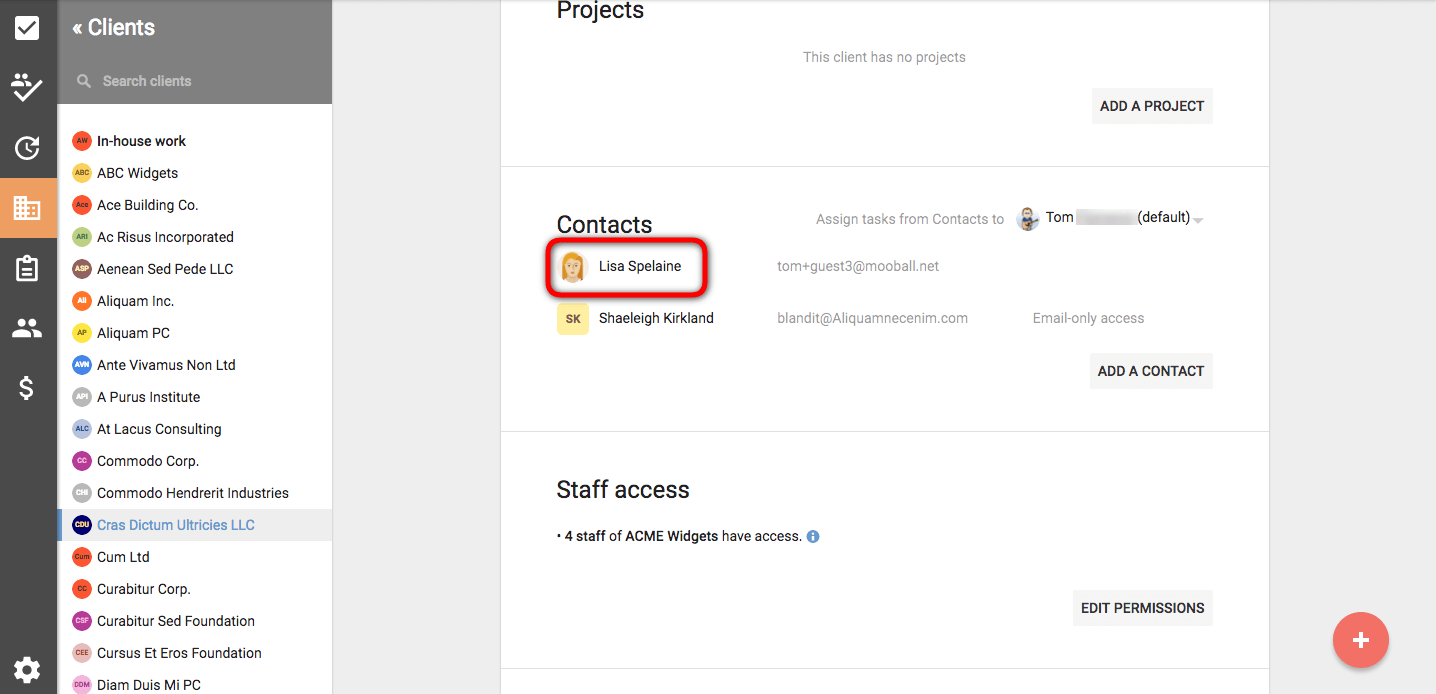
Just as you can switch users from Contacts to Staff, you can do it the other way around to make Staff into Contacts. You simply go to the Team icon on the left sidebar from any page. Identify the Staff member and click on ‘Make a Contact’.
Removing users from your Workspace
Removing users from your Workspace is easy and can be done at any time. Doing so will not affect any of the tasks that they previously created or worked on. All task records and reports will still reference the old user account. Tasks assigned to the deactivated user will remain assigned as they were. This ensures that all historical records remain correct.
Removing Staff
To remove a staff member you simply go into their profile and select ‘Deactivate’. This will automatically remove the user.
Remove Contacts
From within the Client page, you find the Contacts section and identify the Contact you wish to remove. See above Upgrade to Staff. You want to go to the same three dots and select ‘Delete contact’.